 Aurora
ArtLab: prepare layers, traits & links
Prepare aligned artwork, organize variants, control the drawing order and link layers so matching details always appear together.
On this page
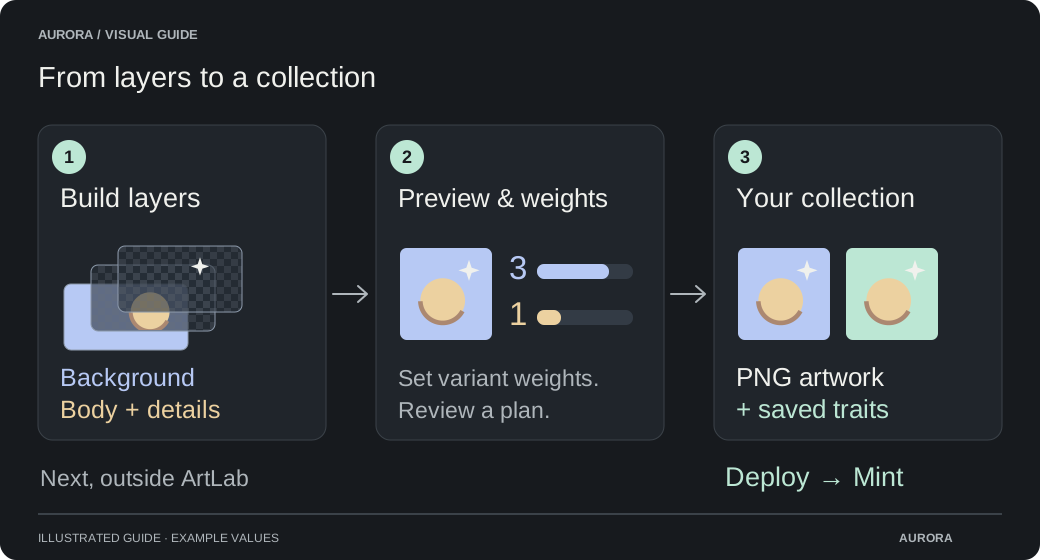
Prepare the artwork before uploading
A layer is one part of the picture, such as Background, Body or Hat. Its variants are the alternative images ArtLab can choose for that part. A rendered artwork uses one eligible variant from each included layer, unless that layer is skipped.
Export every variant on the same square canvas, with each detail already in its intended position. For example, keep an eye drawing in the same place on a transparent 4096 × 4096 canvas as the face beneath it. Preserve the empty transparent space around the drawing; cropping each file tightly can move details out of alignment.
Choose a working size
ArtLab offers 512, 1024, 2048 and 4096 pixel square output. For 4096 × 4096 results, prepare source layers at that size. Enlarging a smaller source does not restore detail.
Export one file per variant
Use transparent PNGs for bodies, clothing and details placed over other layers. Still WebP and JPG are also supported. JPG has no transparency, so it is usually best suited to a full background.
Name the files clearly
Names such as Blue.png, Ivory.png and Gold crown.png become the initial variant names. Use readable trait values instead of working filenames, or rename them after uploading.
Check one complete composition
In your drawing application, place a background, body and upper details together before exporting the whole set. Matching canvas dimensions do not correct artwork that was drawn at different positions.
File, layer and project limits
The limits below apply together. For example, 50 layers does not provide space for 100 files in every layer: the whole project can contain up to 500 variants and saved layer files.
| Item | Limit | What to check |
|---|---|---|
| Saved projects | 10 per Premium profile | Linked wallets share the same profile allowance. |
| Layers | 50 per project | Include backgrounds, artwork-only layers and optional details. |
| Variants | 100 per layer; 500 across the project | Each variant is a selectable source image. |
| Saved layer files | 500 per project | Unused uploads can still occupy file slots until cleaned up. |
| One uploaded file | 10 MB | The processed PNG must also fit within the file limit. |
| Image pixel count | 16,777,216 pixels | A 4096 × 4096 image fits exactly within this limit. |
| Saved source dimensions | Up to 4096 pixels per side | Larger dimensions are reduced to fit, subject to the pixel limit. |
| Layer storage | 512 MB per profile | Saved source images and thumbnails share this allowance across projects. |
| Final artwork | Up to 4096 × 4096; 10 MB per PNG | Rendered artwork also uses your normal collection storage allowance. |
Build the layer stack from background to details
Fix an existing collection’s layer order
Create and select a layer
Start with Background, then add parts such as Body, Shirt, Head and Crown. Select a layer to edit its name, variants and settings.
Upload its variants
Drop files onto the selected layer or choose Upload variants. You can upload several images together. Uploads save automatically; save other edits with Save progress or by moving to the next wizard step.
Set the drawing order
The first layer is drawn first, at the back. Each later layer is drawn over the earlier ones. Use Move earlier (behind) and Move later (on top) to position clothing over the body or a crown over the head.
Inspect more than one result
Use the preview selectors and Shuffle to check different combinations. An opaque upper image can hide everything beneath it, even when the layer order is correct.
Decide which names become traits
Include in traits is enabled by default. The layer name becomes the trait type and the selected variant name becomes its value. A layer named Background with a selected Blue variant produces the trait Background: Blue. These saved traits are used by collection filters and rarity tools.
Use a different name for each layer, and different variant names within a layer. Names differing only in capitalization are treated as duplicates. Layer names allow up to 80 characters and variant names up to 100.
Turn off Include in traits for lighting, shadows, textures or signatures that should be visible without becoming collectible attributes. ArtLab marks that layer Artwork only. Its images, weights, links and position still work; it simply contributes no metadata trait. Count toward uniqueness remains independent, so hiding a trait alone does not make that layer irrelevant to duplicate checks.
Skipped layers add neither an image nor a trait. Renaming a layer or changing Include in traits affects future renders; it does not rewrite artwork and metadata already saved into a collection.
Count character differences without counting every decoration
Select a layer and find Count toward uniqueness. It is checked by default, including for projects saved before this setting existed. Keep it on for the parts that distinguish your characters, such as Body, Eyes or Clothing. Turn it off for Background, lighting or decoration when changing only that layer should not create another unique artwork.
An excluded layer still renders in its normal position. Its variant weights, optional skips and links still apply, and Include in traits can remain enabled. For example, collectors can still see a Background: Blue trait even though a blue background cannot make a second copy of the same character unique.
During planning, ArtLab compares the selected variants and skips only from layers counted toward uniqueness. Once that selection has been used, changing an excluded layer does not create another available selection. During rendering, it also compares the exact pixels of those included layers composited on a transparent canvas. Two differently named source files that make the same character are therefore still duplicates.
The complete final image has its own exact-pixel check as well. This catches cases where an opaque excluded overlay hides otherwise different characters and produces the same finished artwork. A result must pass both pixel checks before it is saved.
Keep at least one layer counted toward uniqueness. Turning off more layers reduces the available combinations, so review the collection size before planning. Save progress and make a new plan after changing the setting; resuming an existing plan keeps its saved settings. Existing gallery artwork and metadata are unchanged.
Combination and probability formulas
10 backgrounds × 5 bodies × 4 eyes = 200 full selections
Background excluded from uniqueness: 5 × 4 = 20 character selections| Layer settings | Rendered image | Saved metadata | Counts toward uniqueness |
|---|---|---|---|
| Both controls on | Included when selected. | Trait included. | Yes. |
| Include in traits off | Included when selected. | No trait. | Yes, while Count toward uniqueness stays on. |
| Count toward uniqueness off | Included when selected. | Trait included while Include in traits stays on. | No; variation only here cannot create another character. |
| Both controls off | Included when selected. | No trait. | No; the complete final-image check still applies. |
Adjust size and position without changing source files
The transform controls apply to the whole layer, including every variant in it. Start with Size at 100 and both offsets at 0 for aligned full-canvas exports. If only one variant is misplaced, correct that source file rather than moving the entire layer.
| Control | Meaning | Example |
|---|---|---|
| Size (%) | 10–200% of the output canvas, scaled around the center. | 50 makes the layer half the canvas width and height. |
| Horizontal (%) | −100 to 100; positive values move right. | 10 moves the layer right by one tenth of the output width. |
| Vertical (%) | −100 to 100; positive values move down. | −5 moves the layer up by one twentieth of the output height. |
Choose between a layer link and a variant link
Links define which images are allowed together. They do not move artwork or change which layer is drawn on top. Open the selected layer’s “[name] layer links” controls or an individual variant’s “[name] links” controls, choose Link to a layer…, then select its allowed variants. A new link initially selects every variant in that layer; narrow it to the matches you want.
A variant’s conditions apply in addition to its whole layer’s conditions. Linking an individual variant does not make an otherwise required layer optional.
| Link location | Use it when… | When its conditions do not match |
|---|---|---|
| Whole layer | The entire layer should exist only with certain choices, such as Crown only on a bare head. | ArtLab skips the whole layer automatically, even if Skip this layer has weight 0. |
| Individual variant | A particular drawing only fits a matching choice, such as Ivory shirt only on an Ivory body. | That variant is unavailable. The layer must use another compatible variant or an allowed skip. |
Read the rules as “any within, all across”
- Within one linked layer, any selected variant is enough: Body → Ivory and Gold means Ivory OR Gold.
- Across different linked layers, every condition must match: Body → Gold plus Head → Bare means Gold AND Bare.
- A skipped source layer has no selected variant, so it cannot satisfy a link that requires one of its variants.
- Links can form a chain, such as Body → Shirt → Badge. They cannot form a circle, such as Body requiring Shirt while Shirt requires Body. ArtLab excludes circular choices.
- Renaming or reordering a layer does not detach its links. Remove links that reference a layer or variant before deleting that item.
Worked example: matching shirts and an optional crown
Create the base choices
Add Body variants Ivory and Gold. Add Head variants Bare and Helmet. Give all four variants positive weights and keep both layers required.
Match shirts to bodies
Create a Shirt layer with Ivory shirt and Gold shirt. In Ivory shirt links, choose Body and keep only Ivory selected. In Gold shirt links, keep only Gold. Leave Shirt’s Skip this layer weight at 0. Both body choices now have a matching shirt.
Limit where a crown can appear
Create a Crown layer and add Plain crown and Jewelled crown. In Crown layer links, require Body → Gold and Head → Bare. The crown layer is automatically absent from Ivory bodies and helmeted heads.
Make the crown optional on eligible artwork
Give Plain crown weight 3, Jewelled crown weight 1 and Skip this layer weight 4. For an eligible Gold body with a Bare head, these choices have relative weights 3:1:4. The crown may be absent even when its links match.
Test each path
Preview Ivory + Bare, Ivory + Helmet, Gold + Helmet and Gold + Bare. Check that shirts match bodies and crowns only appear on Gold + Bare. Then create a collection plan to check compatible counts before rendering.
| Body and head | Shirt | Crown |
|---|---|---|
| Ivory + Bare or Helmet | Ivory shirt | Always skipped by its layer links. |
| Gold + Helmet | Gold shirt | Always skipped by its layer links. |
| Gold + Bare | Gold shirt | Plain crown, Jewelled crown or an optional skip. |
Keep every intended combination covered
If a required layer’s links match but none of its variants are eligible, that combination cannot be rendered. ArtLab excludes the impossible path; it does not choose an incompatible image to fill the gap. This can leave fewer combinations than the number shown before link rules.
For example, adding a Blue body to the shirt example also needs a compatible shirt. You can add a Blue shirt linked to Blue, allow an existing shirt to match Blue, or give the Shirt layer a positive skip weight if a shirtless result is acceptable. A whole-layer link can instead make shirts exist only for Ivory and Gold, automatically omitting them for Blue.
Review links whenever you add a new body shape or disable a matching variant with weight 0. A visually complete preview of one combination does not prove every branch has a valid path.
Set weights and understand planned counts
Create a plan and render the collection