 Aurora
Deploy your first collection
Choose NFT Collection, Editions or Collectibles, then pick an available network and create your collection contract.
On this page
Before you begin
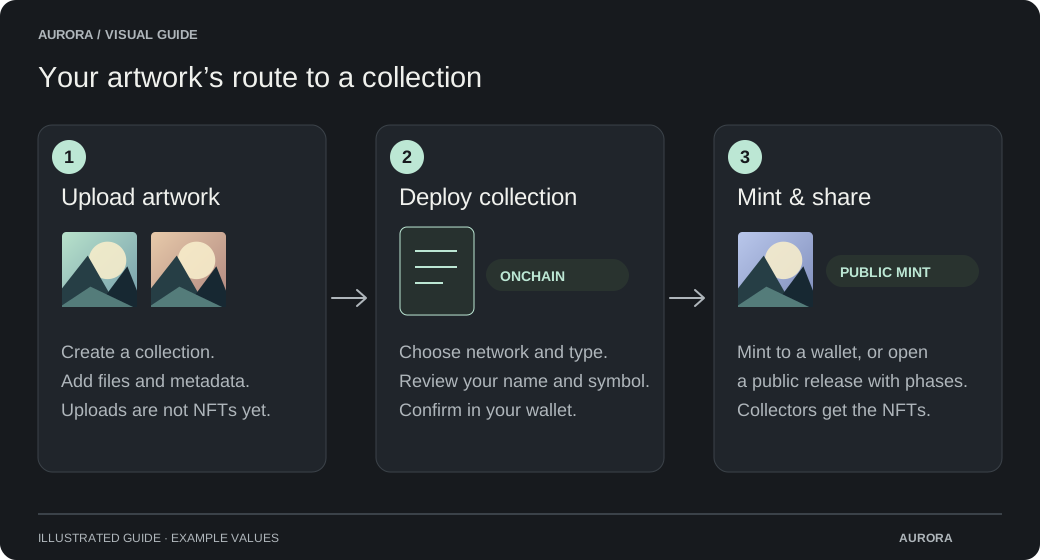
Artwork can be added before or after deployment. You do not need to mint everything at once. Choose Set up mint in your collection for a guided flow, or use the NFT collection panel to manage deployment directly.
- Have active Creator or Premium access and a collection.
- Connect the wallet that should own and manage the collection.
- Have enough native tokens for deployment gas on your chosen network.
Create the contract
Open NFT collection
In your collection, open the NFT collection panel and go to Deploy collection.
Choose a network and collection type
Choose NFT Collection for unique ERC-721 NFTs, Editions for ERC-1155 copies, or Collectibles for collectible types using the independent Collectibles factory. The network list then shows only enabled factories for that type.
Enter your collection details
Choose the collection name, symbol, royalty recipient and royalty percentage. Review them carefully; the network and collection type are permanent choices.
Choose Prepare deployment
Review the prepared action, then confirm the deployment in your wallet. The wallet shows the final gas estimate.
Wait for confirmation
Aurora checks the sent transaction automatically. When deployment is confirmed, your collection address and mint tools appear.
Upgrade an unminted collection
If Aurora has installed a newer factory, open your collection’s NFT collection panel and choose Upgrade contract. This works for ArtLab collections and other creator collections, including ERC-721 and ERC-1155. The owner must have active Creator or Premium access. Collections that have minted even one item cannot migrate, including items later burned.
Migration keeps the same workspace and artwork IDs. Images, traits, rarity data, ArtLab layers and render history, saved PFP, banner, description, website and social links stay in place. The replacement keeps the collection name, symbol, network, NFT standard and royalties. The wizard restores published collection metadata and trading settings through wallet transactions.
Review and start
Aurora checks ownership, the installed factory and lifetime minted supply. Finish or cancel outstanding owner transactions and collection handovers first. The wizard temporarily locks competing contract and mint setup changes.
Pause and close the old mint
Sign the pause transaction and wait for confirmation. Aurora checks again that no mint succeeded, then asks you to permanently close minting on the old contract. If a mint succeeded before the pause, migration stops. No artwork is deleted.
Deploy the replacement
Deploy with the current verified factory on the same network. The replacement uses your current Creator collection size limit and does not consume another collection slot. The old contract remains onchain with minting permanently closed.
Restore and publish
After deployment confirms, Aurora closes the old mint page and attaches the existing workspace and branding to the new address. The new page is published as coming soon, subject to its existing administrator visibility restrictions. Restore any collection metadata or trading settings requested by the wizard, then choose Continue to mint setup.
Review the saved release
Artwork selection, edition quantities, supply, payment recipient, payout mode, CAPTCHA preference, phases, prices, wallet limits, whitelists, exclusions and reveal or placeholder settings are copied into a fresh draft. Saved unpublished edits take priority. Review each stage and publish the release; Aurora rebuilds artwork and whitelist commitments for the new contract. A past phase start time can open the mint immediately when publication finishes.
What happens next?
Deployment creates the collection contract. It does not mint your artwork or open a public sale. Next, customize the mint page and choose between minting selected artwork to a wallet or publishing a public release.